OGC for Teams Onboarding GuideUpdated 2 months ago
The OGC for Teams dashboard helps organisations onboard employees efficiently, manage digital business cards, monitor usage, and centralise billing. This guide walks you through the entire admin setup, from creating your admin dashboard to managing team members and accessing analytics.
1. Create your Admin Account (First-time)
Before managing your team, you’ll need to set up your Admin Dashboard.
- Head to https://teams.ogc.link
- Select Sign Up from the top bar.
- Create your admin account using your email and password.
- Fill in your Profile Information
- Name
- Designation / Job Title
- Mobile Number
- Set up Team Information
- Team Logo
- Team Name (company or organisation)
- Website
- Company Email
- Team Size
- Choose your Pricing Plan. You will be recommended a plan based on your team size. A 30-day free trial is automatically provided; no payment setup required.
- Once confirmed, click Proceed to dashboard → to begin
✨ Pro Tips:
- Note that the admin dashboard is accessible via desktop only.
- You will be able to edit your Profile and Team Information later on
- If you are an existing One Good Card user, your profile details will be reused when setting up
2. Add Team Members
Manage and onboard team members easily using individual invites or bulk upload.
Adding Team Members Individually
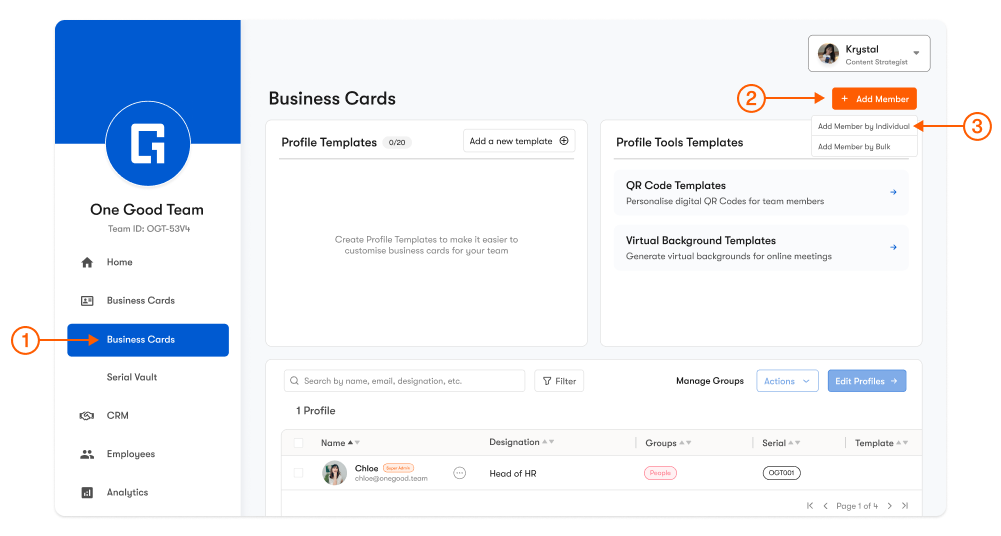
- Head to Business Cards from the menu sidebar.
- Click + Add Member, and Add Member by Individual
- Enter the basic profile details of the individual
- Name
- Email (used for login as well)
- Serial Number (if you have a physical One Good Card product to activate)
- Click Proceed to confirm the addition of the individual business card.
- You will be able to restrict the following from the individual:
- Restrict Profile Editing: Members will not be able to edit their digital business card details, but will be able to access their One Good Card account and other features (CRM, Analytics etc.)
- Restrict Account: Members will not be able to log in to their One Good Card account entirely
- Once confirmed, select Add Business Card to proceed.
Adding Team Members via Bulk Upload

- Head to Business Cards from the menu sidebar.
- Click + Add Member, and Add Member by Bulk
- Download the CSV file, and fill in the details of your members.
💡 Things to Note:
- Maximum 200 team members in one upload
- No duplicate email address or serial number
- Ensure that serial numbers have not been previously activated or are invalid
- Enter "Yes" / "No" based on whether you would like to restrict editing or show OGC footer branding
- Once you have filled in the details, save the CSV file and upload
- Confirm the details of the team members you have added.
- If you encountered any errors, such as duplicated emails or invalid serial numbers, double-click each input cell to edit the field.
- You will also be able to set restrictions and assign groups here. Select the members by clicking on their checkbox, and select Set Restrictions or Assign Groups
- If you have uploaded a team member by mistake, you can select their checkbox and Remove
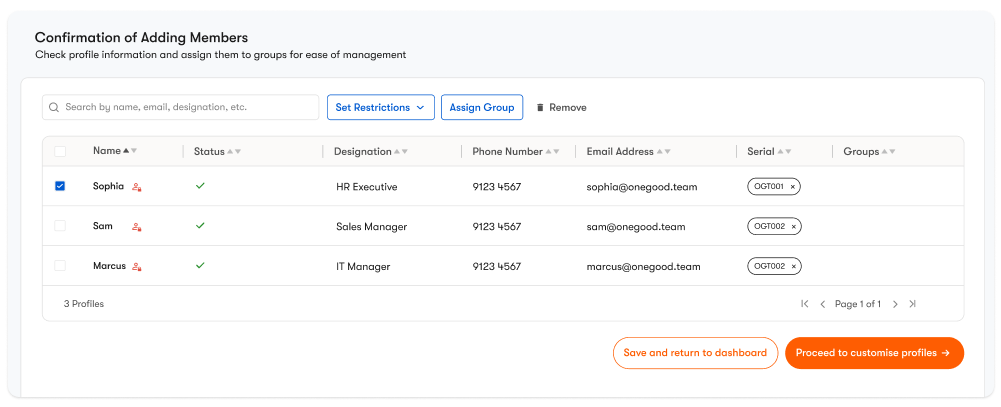
- Once ready, Save and return to dashboard or Proceed to customise profiles
3. Edit Team Business Cards
Edit your team's digital business card using Widgets & Styles.
- Widgets — contact fields, links, maps, files, videos, images, etc.
- Styling — background, button and icons colours, text colours.
Create Team Profile Templates
Profile Templates help ensure brand consistency across all team member profiles.
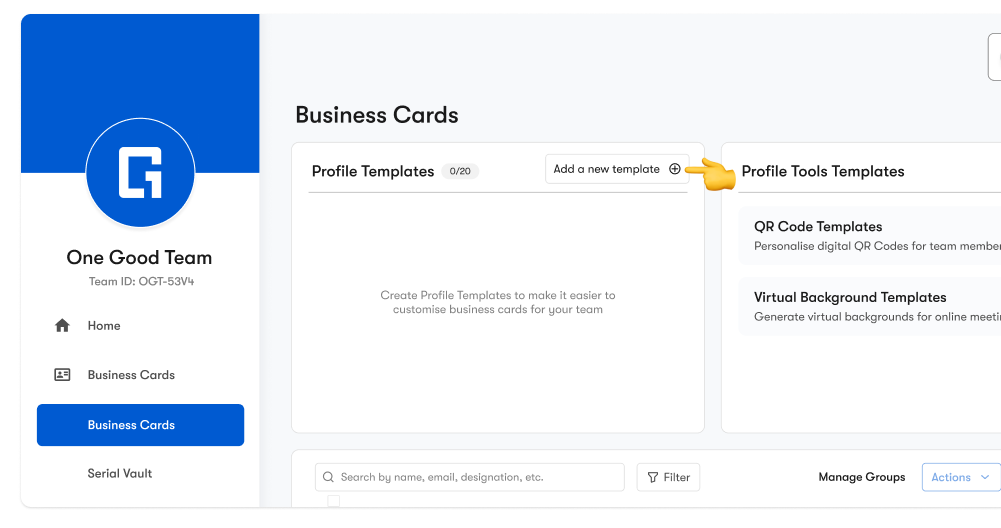
- On the Business Cards page, under Team Templates, click Add new template +.
- Select any pre-built template to quick-start or Customise from scratch
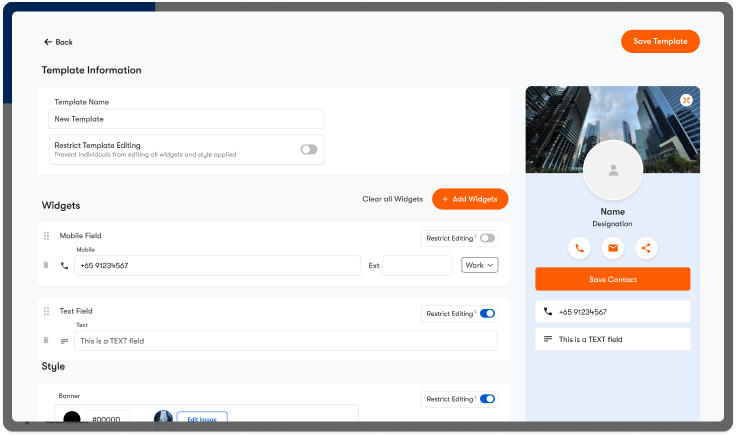
- Edit your template name
- Add Widgetsto the profile template and fill in their details. Here are some commonly used widgets:
- Company Details: All your important company contact details, such as website, email, address
- Social Fields: Add and share your company's social media platforms, such as Instagram or LinkedIn
- Contact Form: Collect leads and enquiries directly from your digital business card
- Style your team's business cards according to your corporate/team branding
- Banner & Background: Enter the HEX code or upload an image
- Text, Button and Icons Colour: Enter the HEX code to customise
✨ Pro Tips:
- The maximum size for image upload is 5MB.
- Pay attention to the colour contrast and readability of your digital business card when selecting the colours and styles
- Set Editing Restrictions: You can either restrict Template Editing entirely or restrict individual widgets and styles. This prevents team members from logging in and editing any details on their own.
- Once you are done customising, remember to Save Template
Set Up Member Profiles
Once you have created templates, apply them to your team members' digital business cards
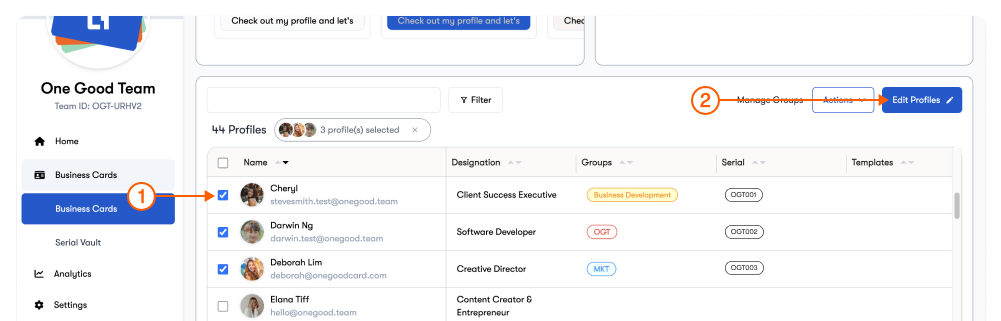
1. On the Business Card page, select the members you want to edit.
2. Click Edit Profiles.
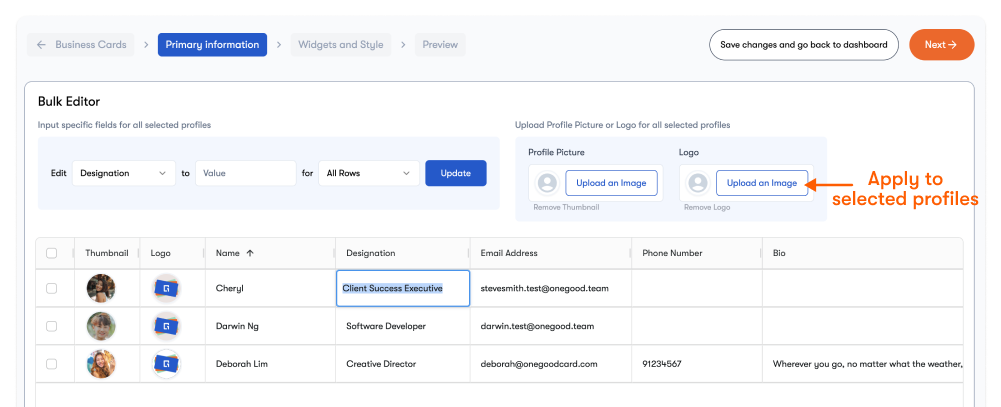
3. Edit Primary Information
- Upload images to the Profile Picture by selecting the + icon
- Edit directly by double-clicking and typing in their individual fields.
- Use the Bulk Editor to mass edit the fields that are the same for all profiles. Select the fields (e.g. Designation) → Enter the value (e.g. Sales Executive) → Select for All Rows or selected rows
- Upload your logo image to the bulk editor and apply it to all selected profiles
4. Once you have completed editing the primary information, click Next → to begin styling.
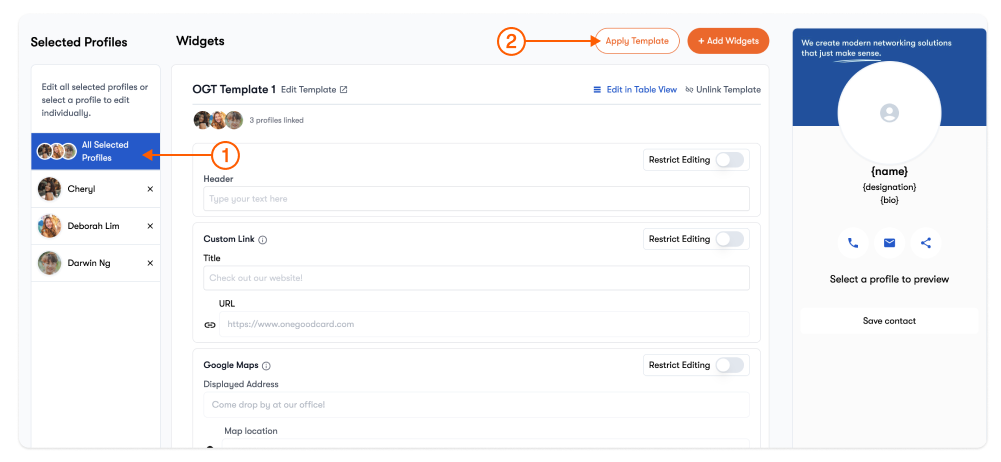
- Ensure that you are on All Selected Profiles, click Apply Template and select the template you have previously created to apply it to your team member profiles. You can either:
- Change Template: Current template (widgets and styles) will be replaced with the newly selected template. Any existing add-on widgets will remain on the profile.
- Overwrite Profile: Remove all existing widgets and apply the newly selected template.
- You can choose to add on more widgets to individual profiles by selecting them on the sidebar
5. Once you have completed the profile widgets and styling, click Next → to Preview.
6. Preview the profiles and head back to edit if there are any changes to be made. You will be able to edit Advanced Settings for team members here as well.
7. Once done, click Save Changes to finish editing your team member's digital business cards.
3. Admin Controls
Manage your team members effectively with admin permissions and tools.
As an Admin, you will be able to :
- Preview and edit member profiles
- Assign or remove admin roles
- Manage serial numbers (link/unlink/transfer) via Serial Vault
- Reset login email or password for individual users
- Remove or permanently delete members from the dashboard
Assign more Admins
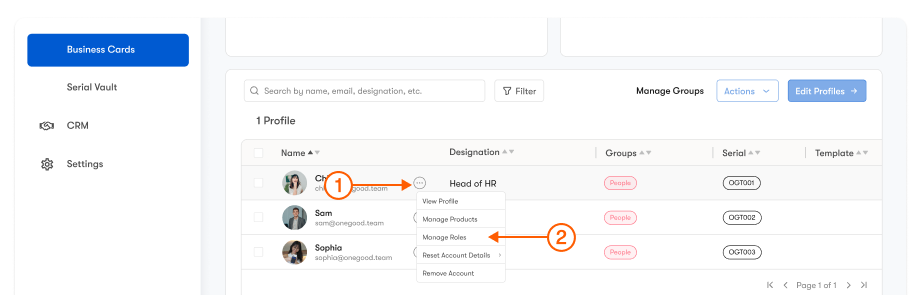
- On the Business Card page, hover over the individual member you would like to assign as an admin
- Click on the ⋯ icon, and click Manage Roles
- Select "Admin" to assign admin permissions to the team member
- Click Save to confirm the action.
Note: Only the Super Admin will be able to assign new admins.
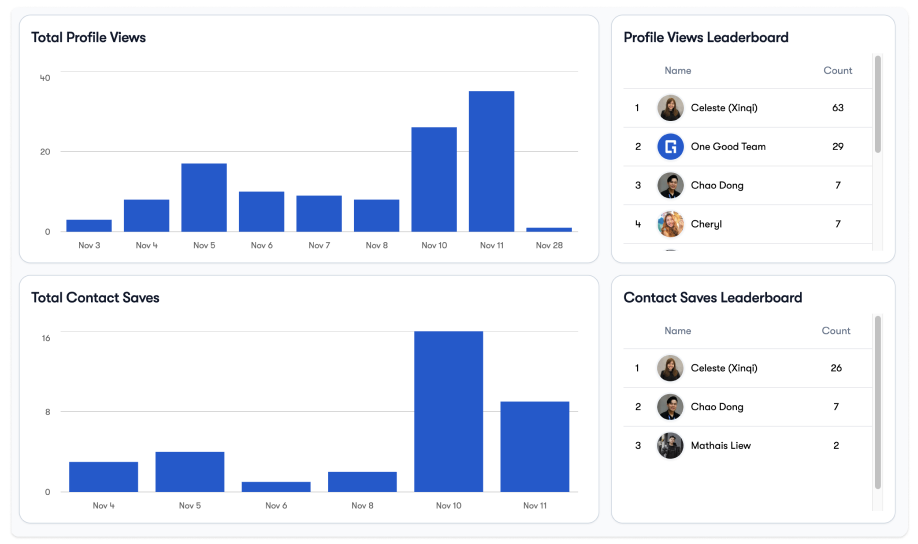
4. Analytics Overview
Monitor company-wide networking performance using the analytics dashboard.
- View total profile views across the team.
- Track saved contacts and engagement activity.
- Review member leaderboards to identify top performers.
- Analyse trends by different date ranges.
Frequently Asked Questions
Q: Who can access the admin dashboard?
A: Only Admins and Super Admins can access the team admin dashboard on desktop. Regular users cannot access admin controls, and will only be able to access their individual dashboard if permission is granted
Q: Can I link or transfer card serial numbers?
A: Yes. Admins can link, unlink, or transfer serial numbers under Serial Vault.
Q: I need additional help!
A: Get in touch with your dedicated sales representative or reach out directly for assistance